At this point I have all the electronics working.
I just had to add the phototransistor by following a tutorial. A quick test showed it works really well. I connected a cardboard disc to the motor, taped a few coins on the bottom side in one place, and put the sensor under the disc. There is a very large difference in the values you get back from the sensor when it’s covered with something and when not.
Here’s a first attempt at visualizing the schematic with Fritzing:
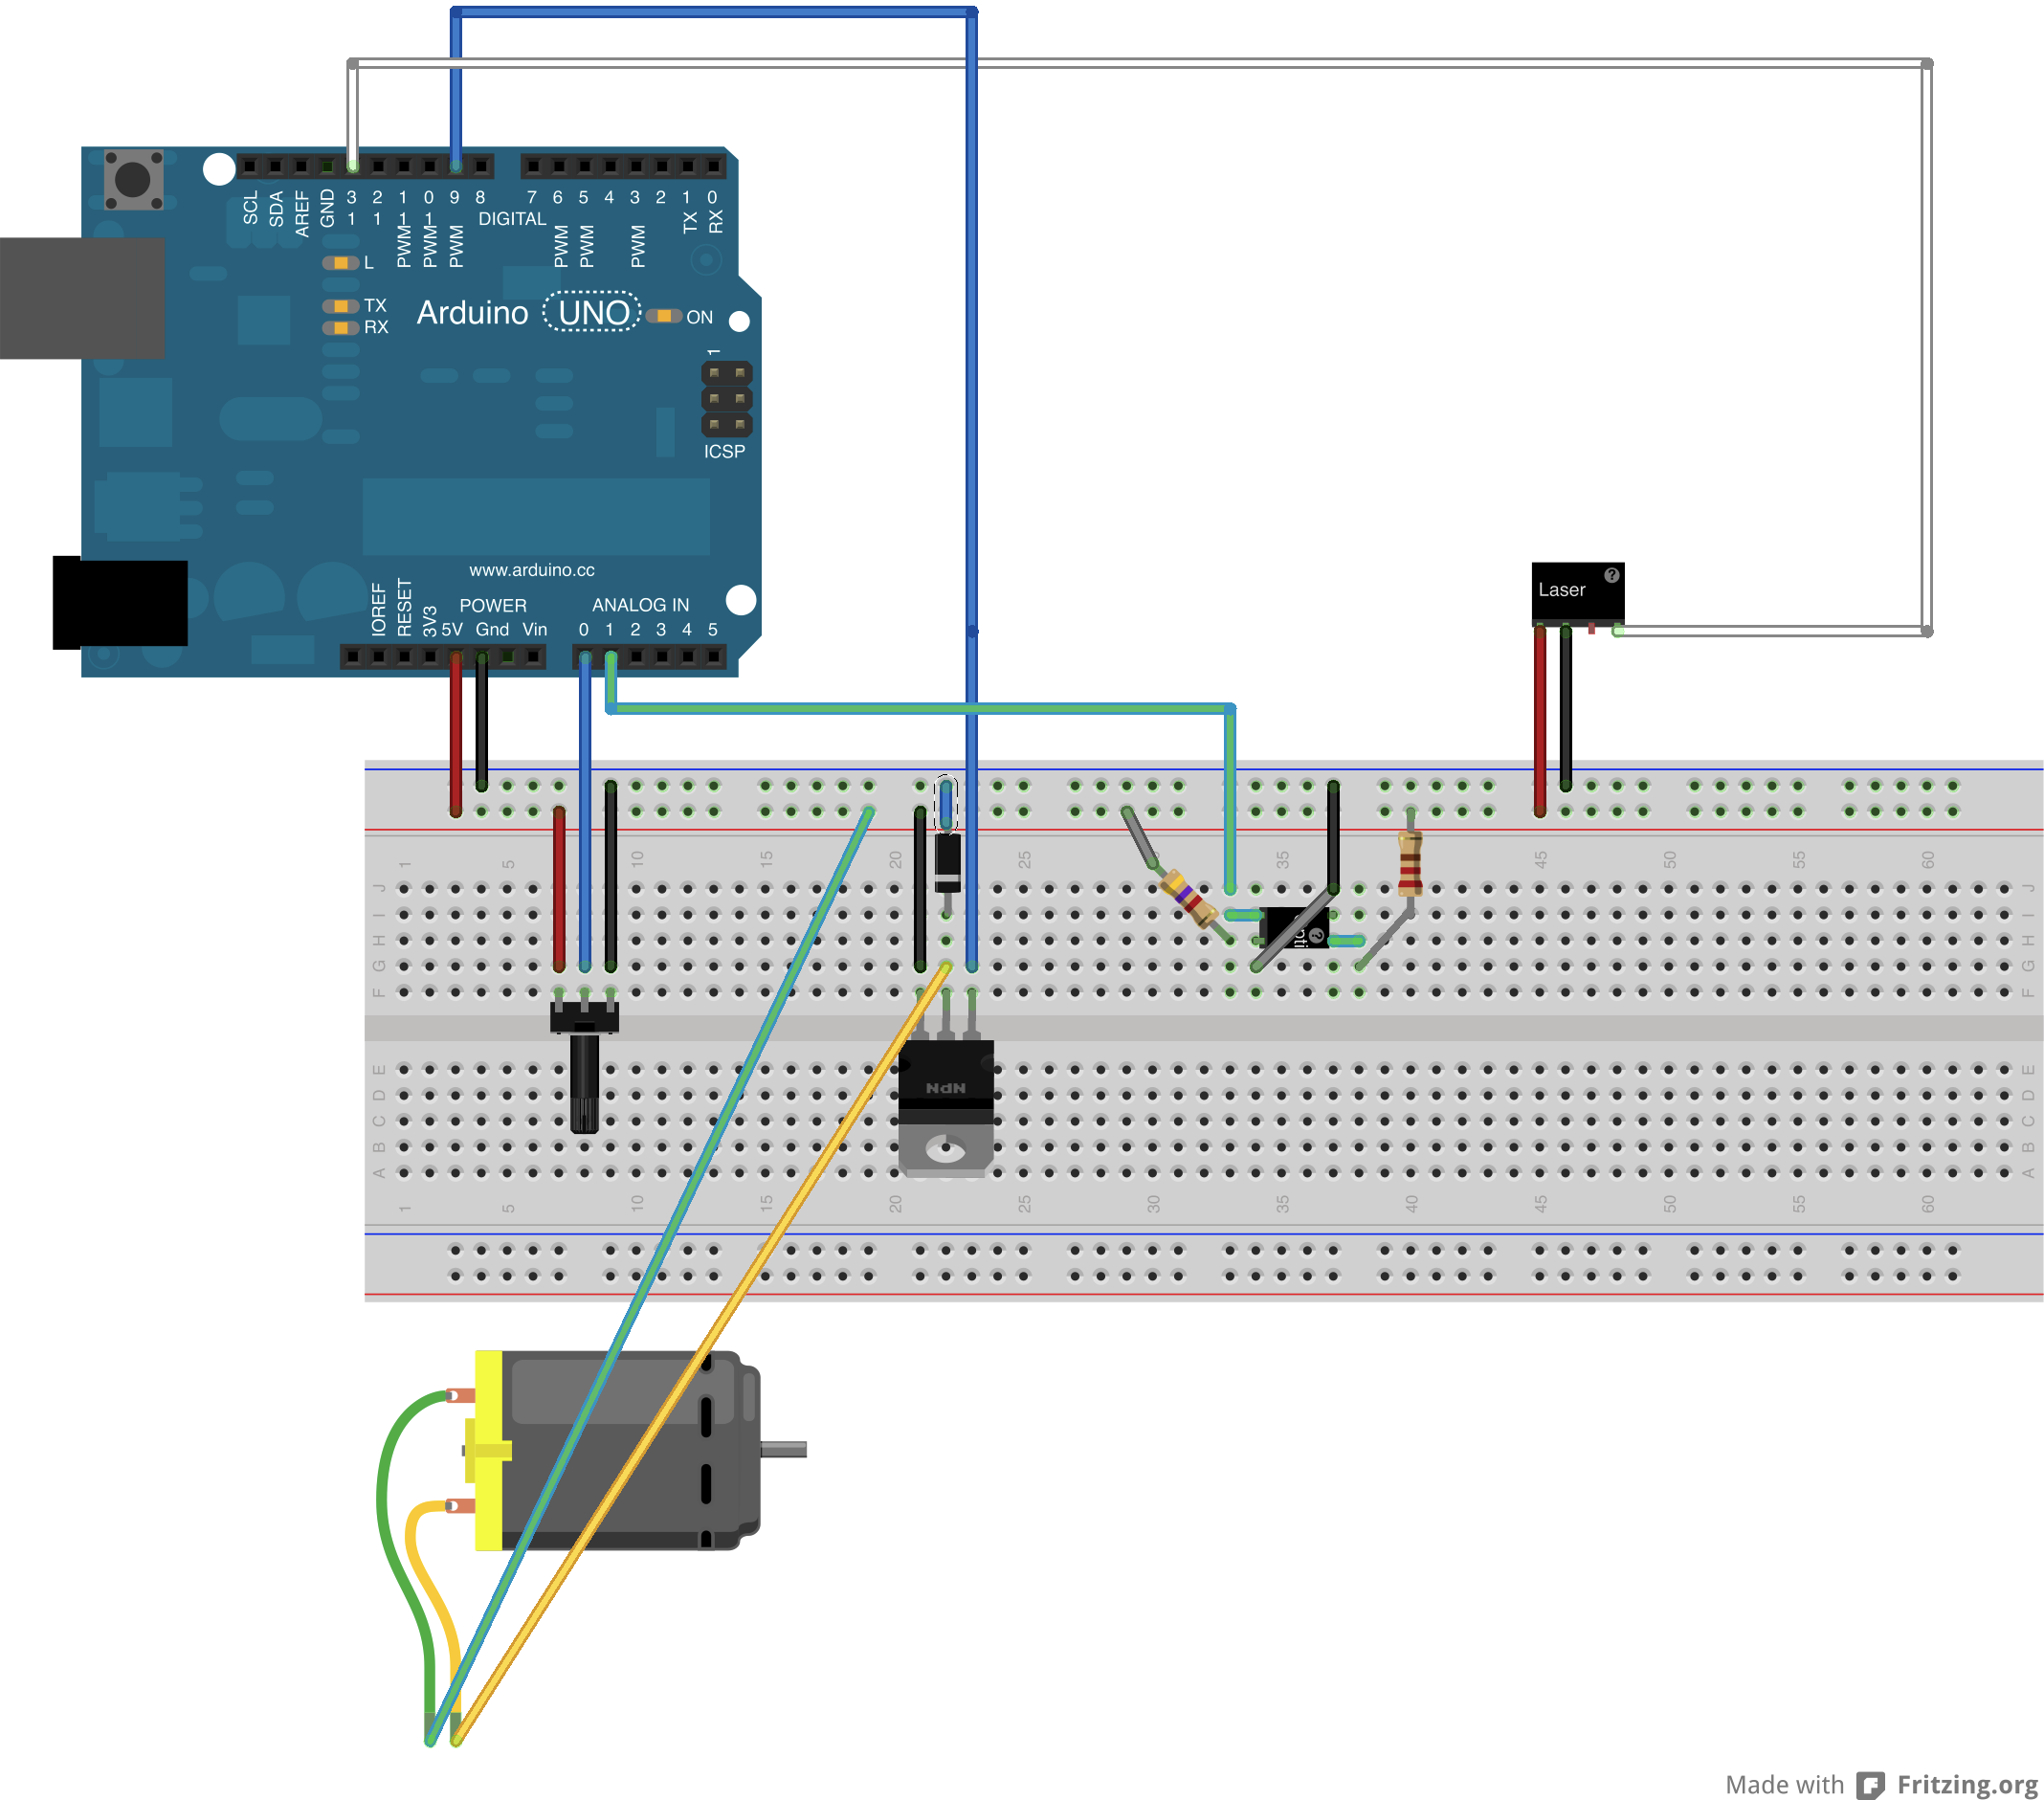
Note that for now this includes a pot (to set the motor speed) and no external power (doesn’t seem necessary for now).
And this is a simple program that will turn on the laser when something is in front of the photo sensor:
const int transistorPin = 9;    // connected to the base of the transistor

const int laserPin = 13;    // connected to laser TTL control (white wire on https://www.sparkfun.com/products/8654)
void setup() {
// set the transistor pin as output:
pinMode(transistorPin, OUTPUT);
// set the laser TTL pin as output:
pinMode(laserPin, OUTPUT);
Serial.begin(9600);
}
void loop() {
// read the potentiometer:
int potValue = analogRead(A0);
// map the sensor value to a range from 0 - 255:
int outputValue = map(potValue, 0, 1023, 0, 255);
// use that to control the transistor:
analogWrite(transistorPin, outputValue);
int photoSensorVal = analogRead(A1);
Serial.println(photoSensorVal);
// turn on laser if something is close to the photosensor
if(photoSensorVal < 100){
digitalWrite(laserPin, LOW);
} else {
digitalWrite(laserPin, HIGH);
}
}
That’s actually it for the electronics. This part went easier than expected, thanks to some great tutorials on SparkFun, Bildr, the physical computing wiki from ITP – and of course Alex’s great courses.
What’s next: I have to find a nice design to keep all the parts together. Now everything is literally kept together with tape, which is not very safe. I already sent some mirrors flying around the room. I think I’ll start with moving the optical sensor related things to a second breadboard and connect it to the other one with some longer wires.
3 Trackbacks
http://Www.memeio.org/…
Laser projector project, part 2: electronics…
christian louboutin men…
Laser projector project, part 2: electronics…
agilaspire.com…
Laser projector project, part 2: electronics…